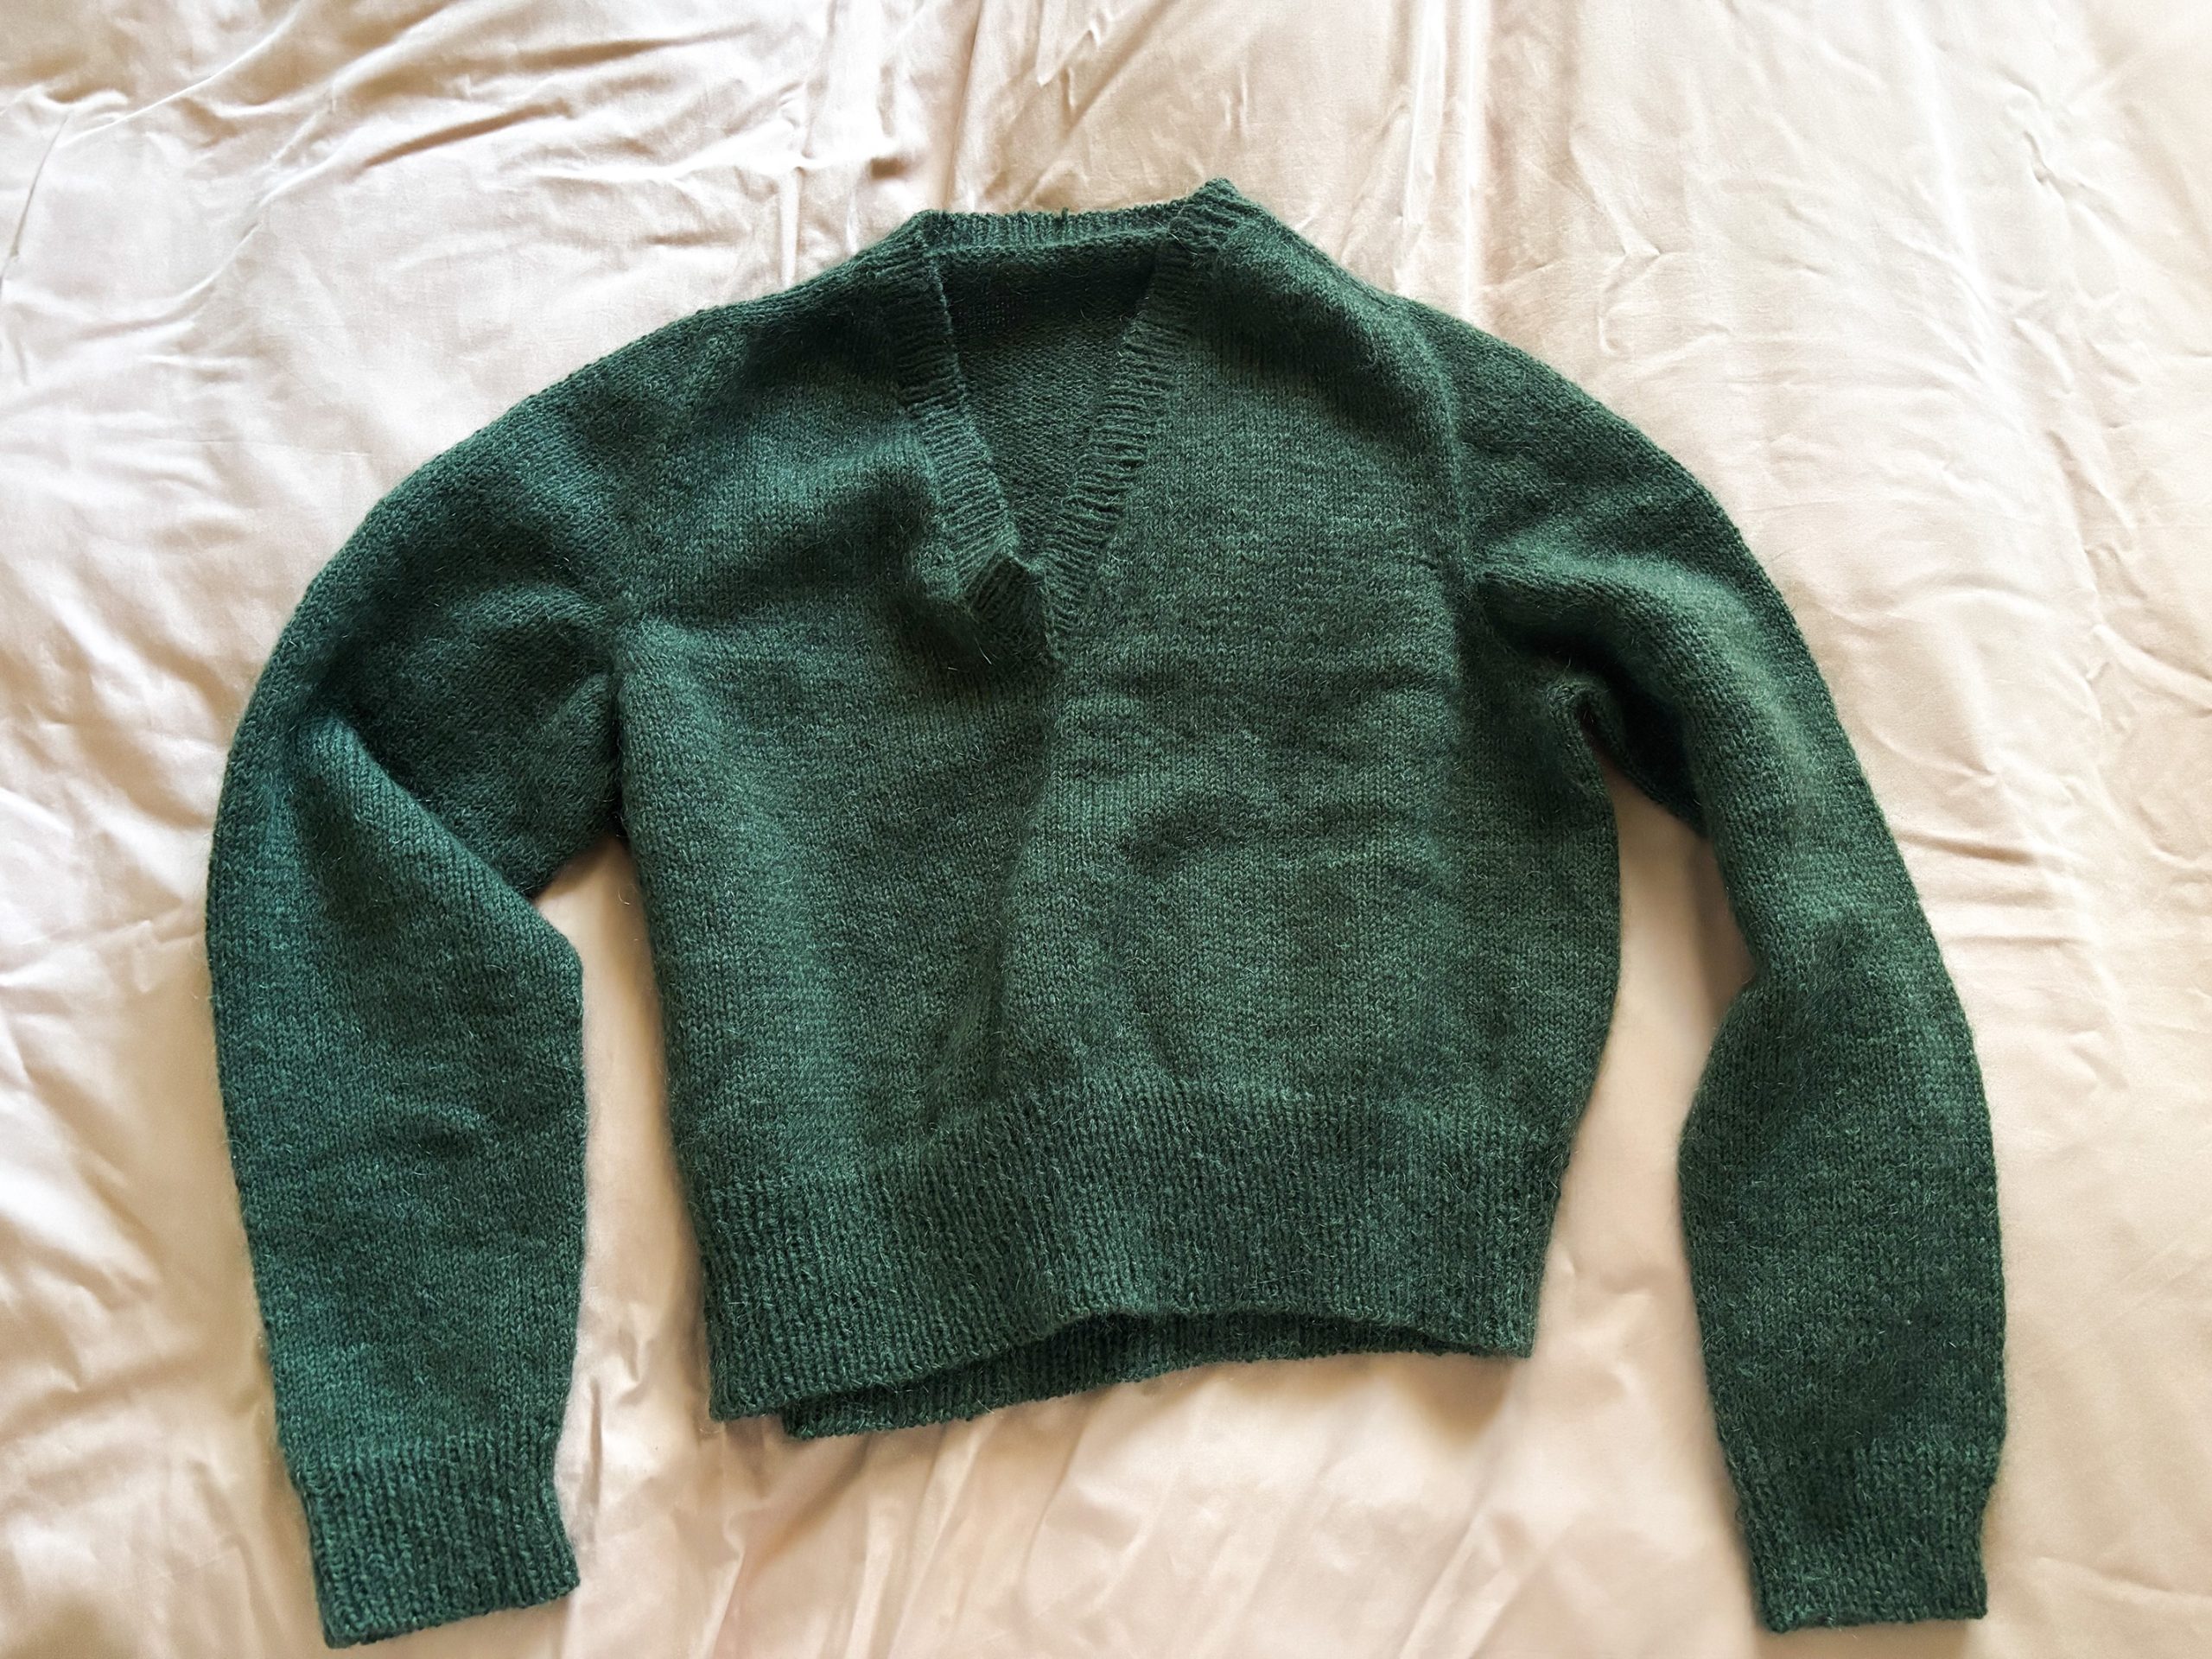
I think that it goes without saying that my holy grail cardigan pattern is PetiteKnit’s April Cardigan. I’ve made so many of them that I’ve had to put a few of them into storage for the time being.
Even though most of my outerwear knits have been cardigans, I’m not entirely opposed to trying the odd sweater pattern. Over the years, I’ve become very particular about sweater patterns, favouring those with a v-neck. Yet, for all of the sweater patterns that I’ve pulled up, there haven’t been too many that were simple (a la PetiteKnits) and featured a v-neck.
Then it occurred to me: why not try modifying a pattern I know and love?
The April Cardigan already ticked most of the boxes. I knew the fit suited me, I liked the construction, and I’d knitted enough of them to feel comfortable making adjustments. Converting it into a sweater seemed like a natural experiment.
The Pattern
The April Cardigan might not have been my first cardigan pattern, but has firmly become my go-to. It is one of those rare patterns that seems to hit the sweet spot between simplicity and wearability, which perhaps explains why I’ve knitted so many of them.
The construction is worked from top down, beginning at the back of the neck before progressing through the yoke, forming the armholes (where the sleeves will be added later), and continuing down through the body and the bottom edge.
Turning a Cardigan into a Sweater
When I first started mulling over how I would go about sweater-fying this pattern, the burning question was: at which point do I join the piece into a tube?
Past experience from knitting the Friday Slipover V-Neck suggested that the join should happen when the v-neck increases finish on row 59 (I do not count that first row of purls). Because the total stitch count at this point was an odd number (259 stitches for my size), I only needed to cast on 1 stitch to bridge the gap. I also added a stitch marker after working that bridging stitch to mark the start of what is now the round.
From there I worked the rest of the yoke and body according to the pattern.
The next thing to be addressed was the neckline itself.
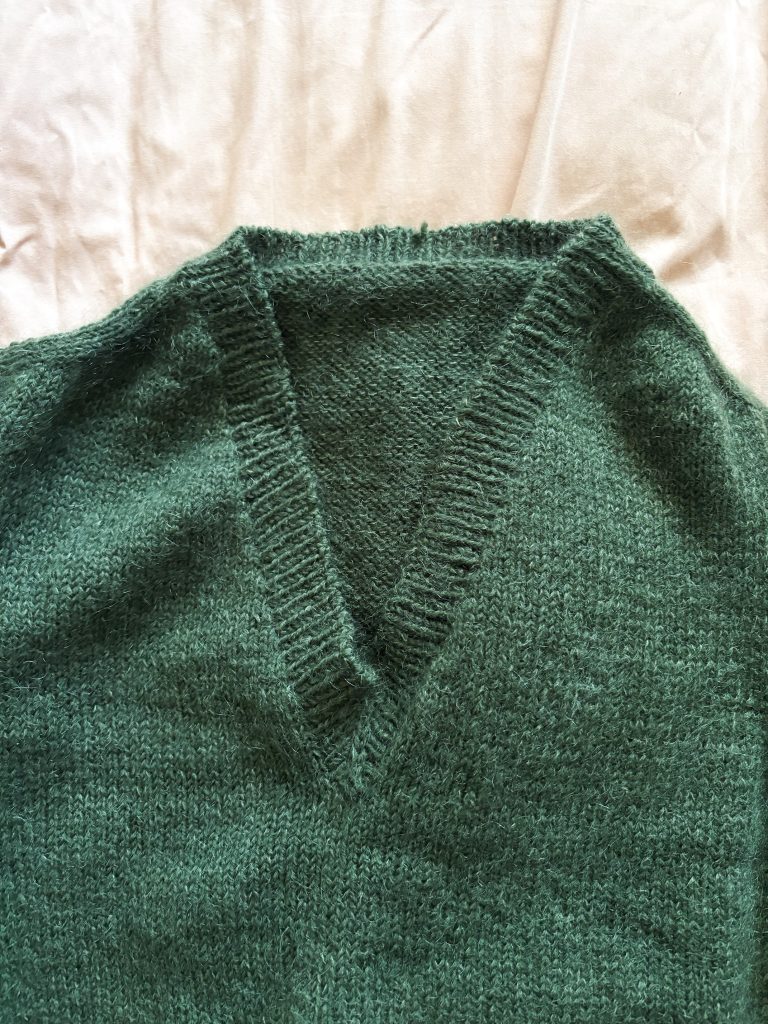
For this, I used the Friday Slipover as a reference. This is the part where I would like to emphasise the importance of placing stitch markers along the neckline after working the initial purl row. This was to ensure that the same number of stitches were picked up on each side of the neckline. For myself, I put my stitch markers at the following points of the neck edge:
- The centre stitch at the back of the neck.
- Before & after the sleeve stitches.
- At the bridging stitch once the work was joined in the round
I then proceeded to work the neckline according to the instructions for the Friday Slipover.
Other than these adjustments to the body and neckline, the remainder of the sweater followed the original April Cardigan instructions.
Would I Knit This Again?
The short answer is yes, I would.
Despite my initial reservations regarding how well the pattern would take to being sweater-fied, it turned out rather well.
That said, I already have a few ideas for what I would change on “April Sweater #2”.
Firstly, I’d extend the body by a few centimetres. For this sweater, I followed the original instructions and stopped the body when it measured 44cm from the cast-on edge. Even with the additional 10cm of the bottom band, it still sat a touch above my belly button. For #2, I’d like the sweater body to finish a couple of centimetres below it.
Secondly, I’d work several more rounds on the sleeves before transitioning to the cuffs. The current instructions yielded sleeves that sat neatly on the arm, but I’d be curious to see how the sweater looks with a little more volume through the sleeves.
Another modification I’d consider is changing the sleeve style altogether. Perhaps some variation of a balloon sleeve.
For a first attempt, however, I’m pleased with how the experiment turned out. More importantly, it gave me exactly what I was looking for: a simple v-neck sweater based on a pattern I already knew and loved.
